RA8D1 Vision Board 实现 FAL 同时调用片上以及外挂 Flash
记录本人在参与 Vision Board 创客营活动(第一阶段)过程中所产出的内容
RA8D1 Vision Board 实现 FAL 同时调用片上以及外挂 Flash
- 使用软件:
- RT-Thread Studio 2.2.7 -> 工程创建与编辑
- FSP Smart Configurator 23.10.0 (FSP Version: 5.1.0) -> 配置和管理 RA8D1 芯片
- MobaXterm Personal Edition V24.0 -> 串口终端
- 测试内容:QSPI-FLASH(fal+文件系统)
- 测试对象:8 MB QSPI-FLASH(型号:W25Q64JV)
1 环境搭建
主要参考 RT-Thread 文档中心以及官方创建的腾讯在线文档
1.1 遇到的问题及解决方案
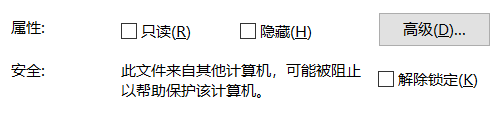
在官方文档的指引下,安装过程本是一路顺风,最后却卡在了 RT-Thread Studio 的 .exe 安装步骤。
- 错误现象:双击或右键管理员打开
.exe文件均无反应 - 解决办法:本来以为需要研究用户组策略等问题,但最后无意间发现,只需要右键
.exe文件进入属性页,勾选“解除锁定”复选框即可…
2 启用 FAL 组件并同时调用 片上&外挂 Flash
初次接触 RT-Thread,进度比大家慢,因此也获得了参考前辈们经验的机会,在此表达敬意!
参考资料:
2.1 配置 RT-Thread Settings
首页:Drivers 启用串口、Pin、SPI、SFUD: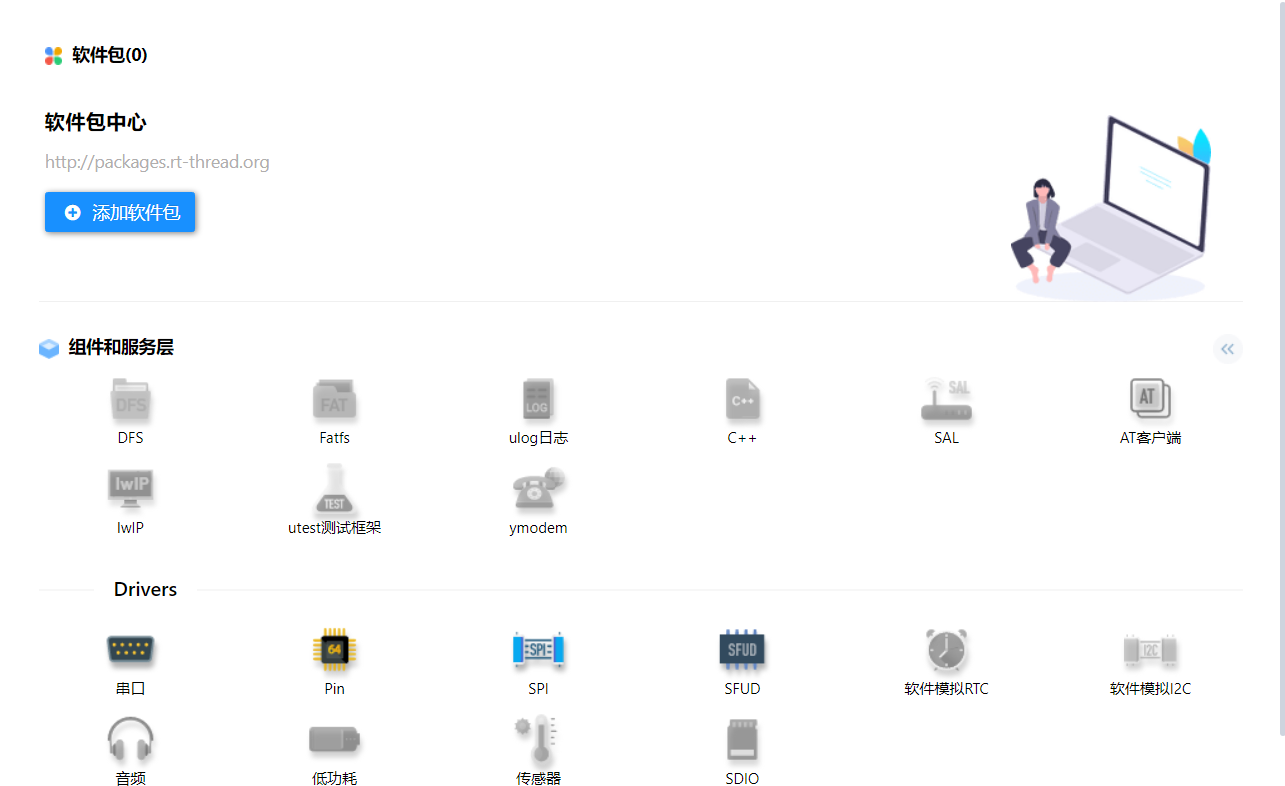
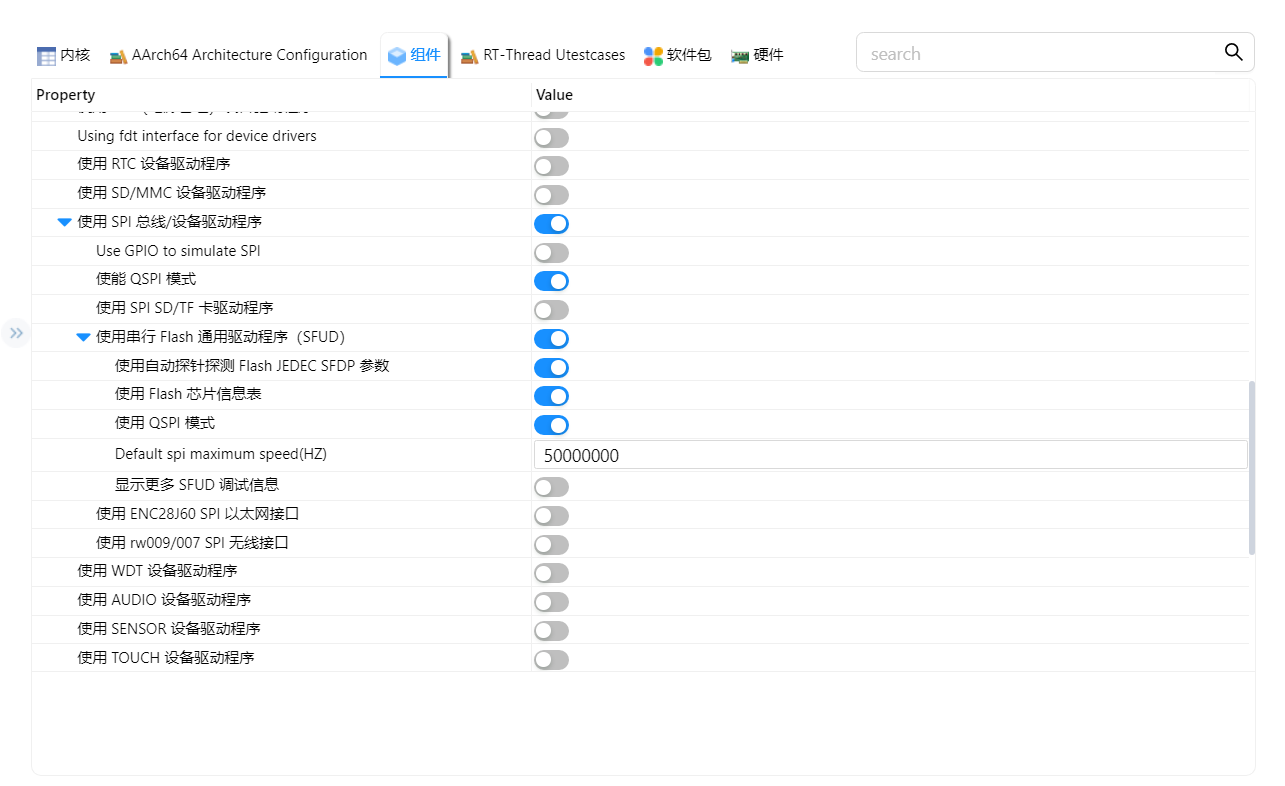
组件页:设置如下: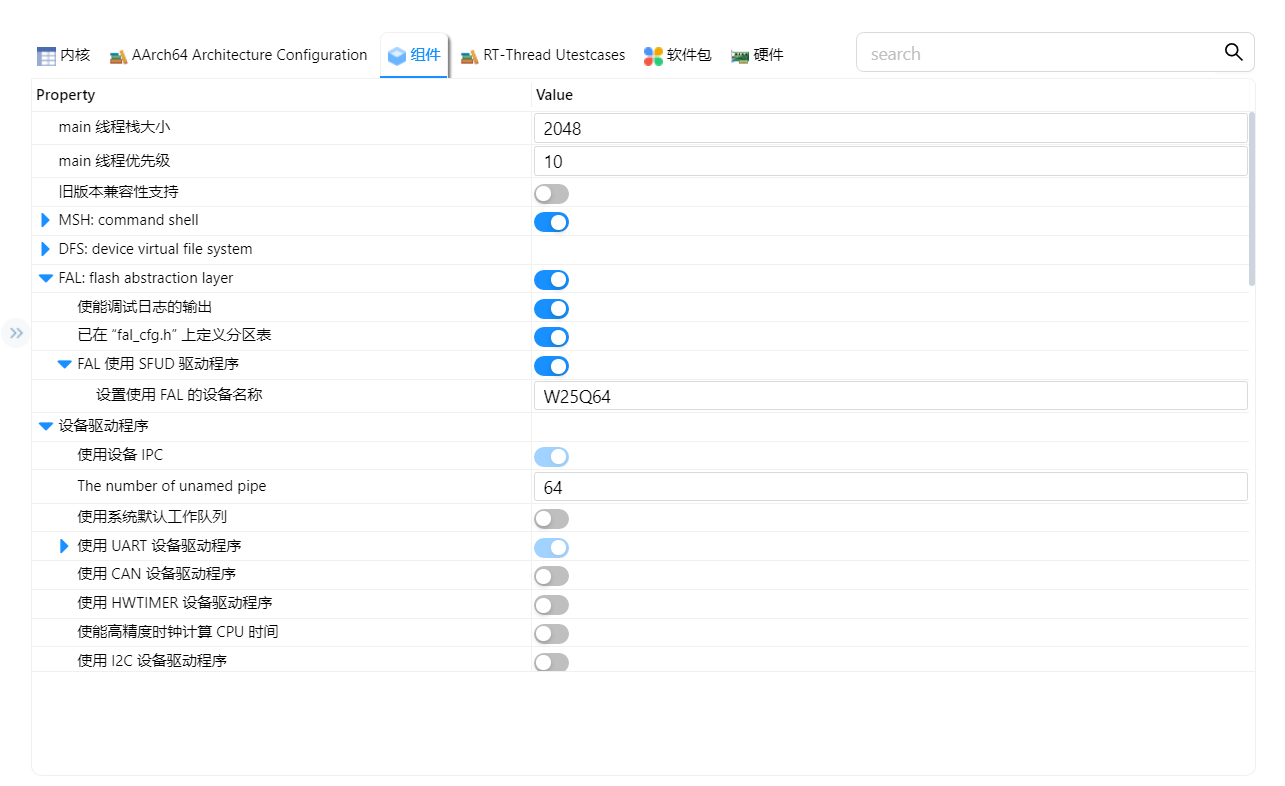
硬件页:启用 Onchip FLASH、SPI1 BUS: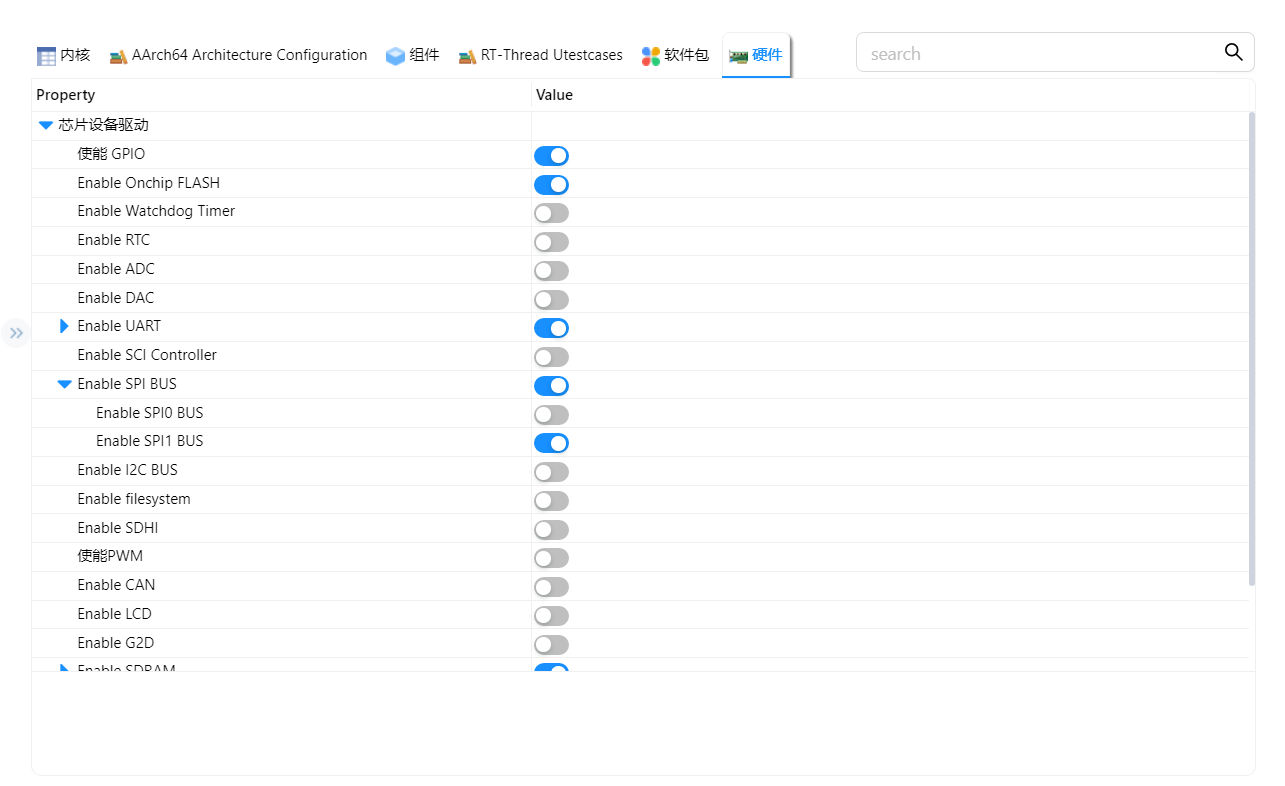
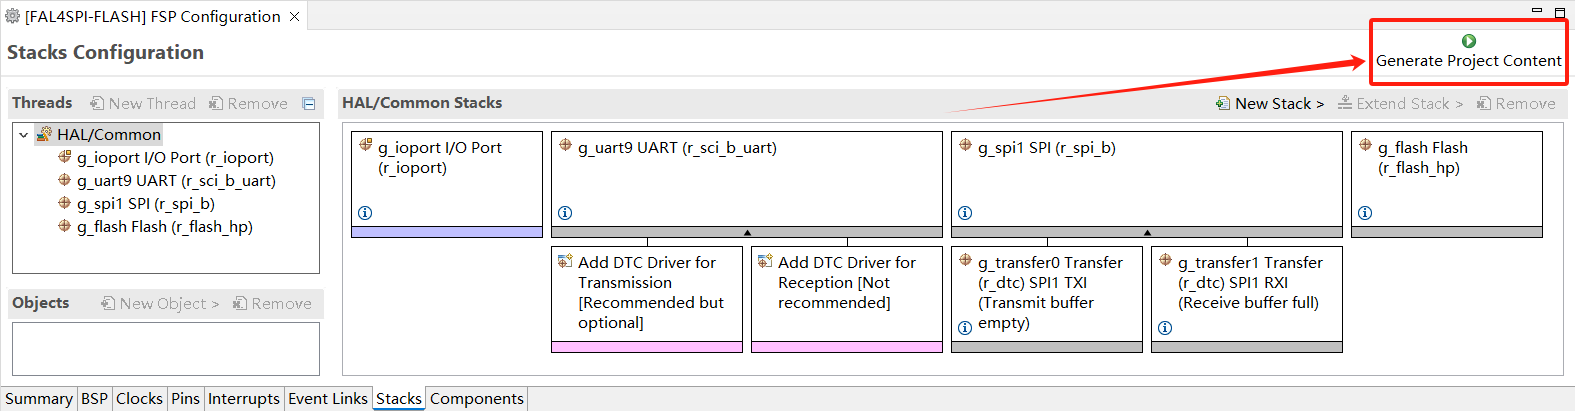
2.2 配置 RASC
Stacks:启用 g_spi1 SPI(r_spi_b)、g_flash FLASH(g_flash_hp) 栈: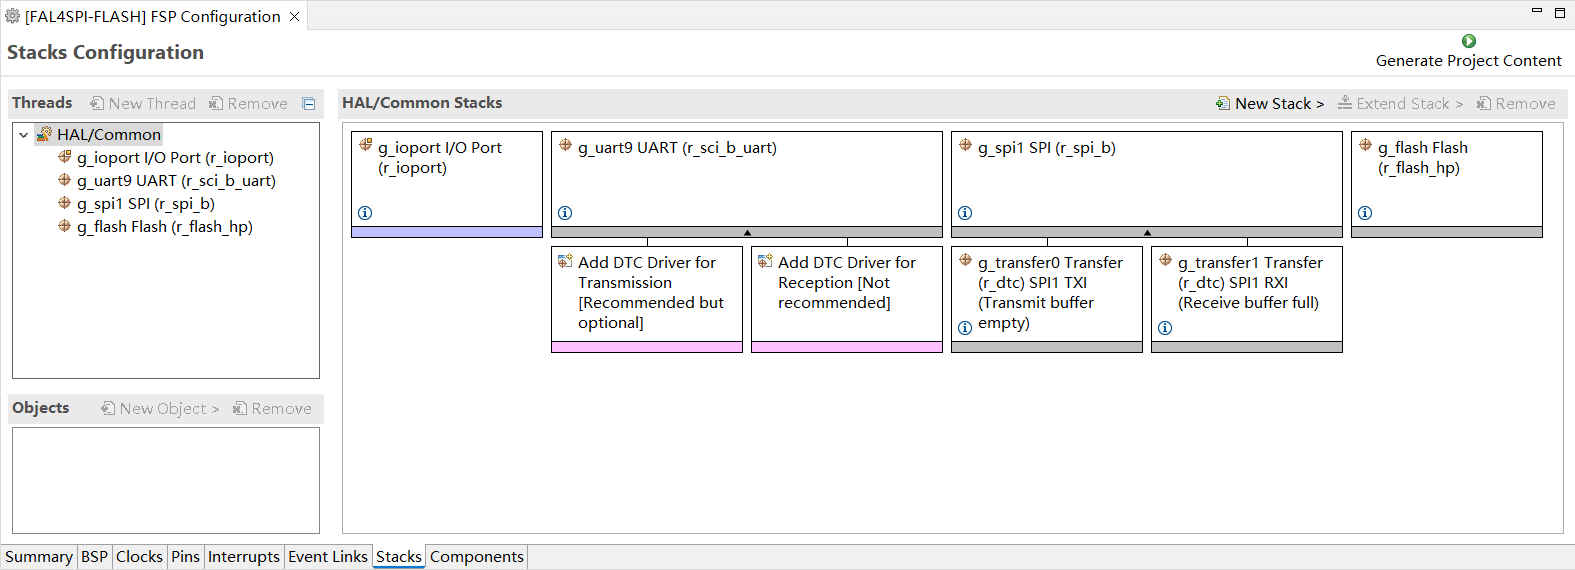 这里需要注意,两个栈的具体设置需要与代码对齐:
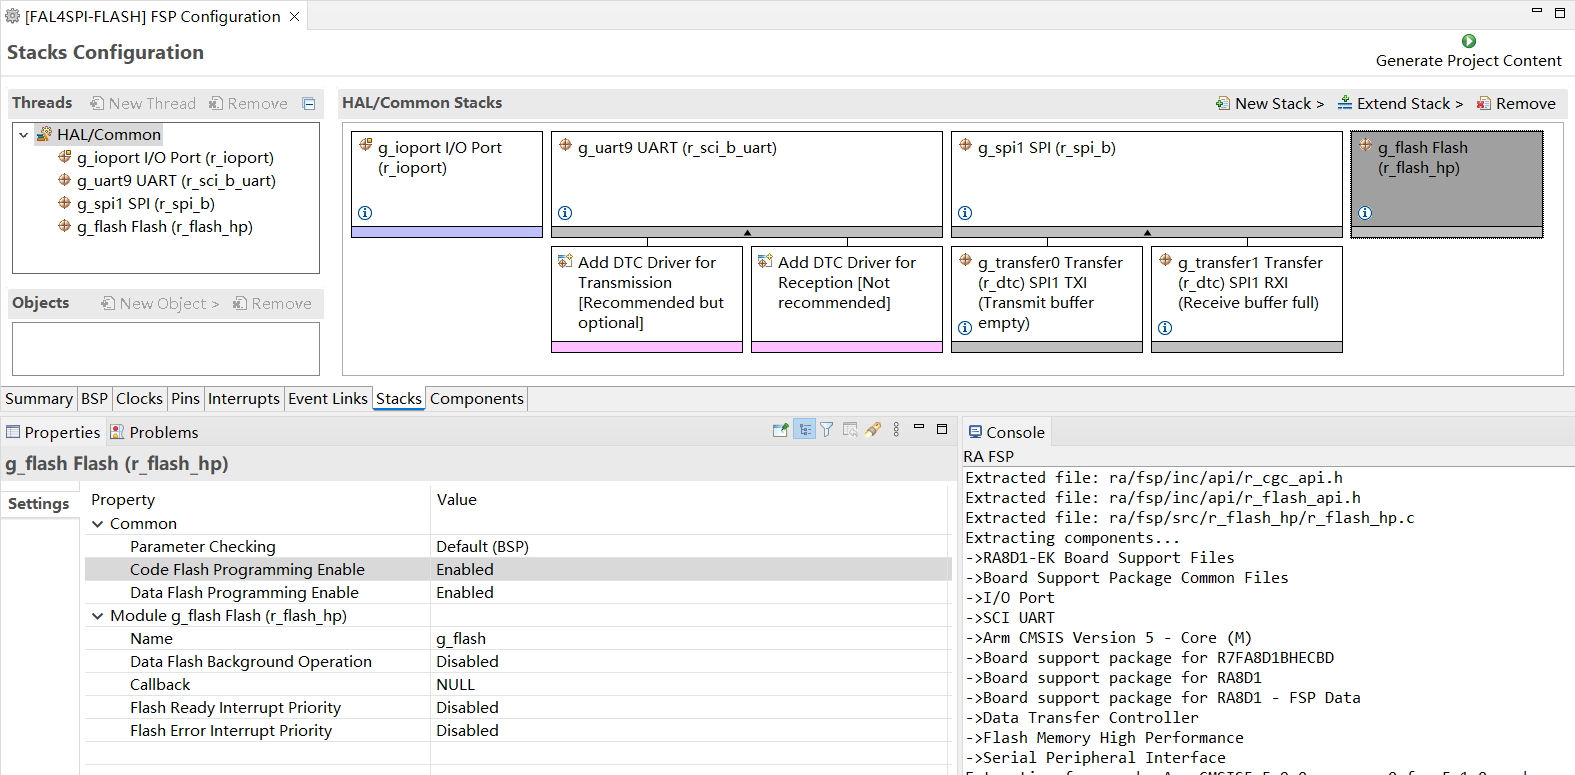
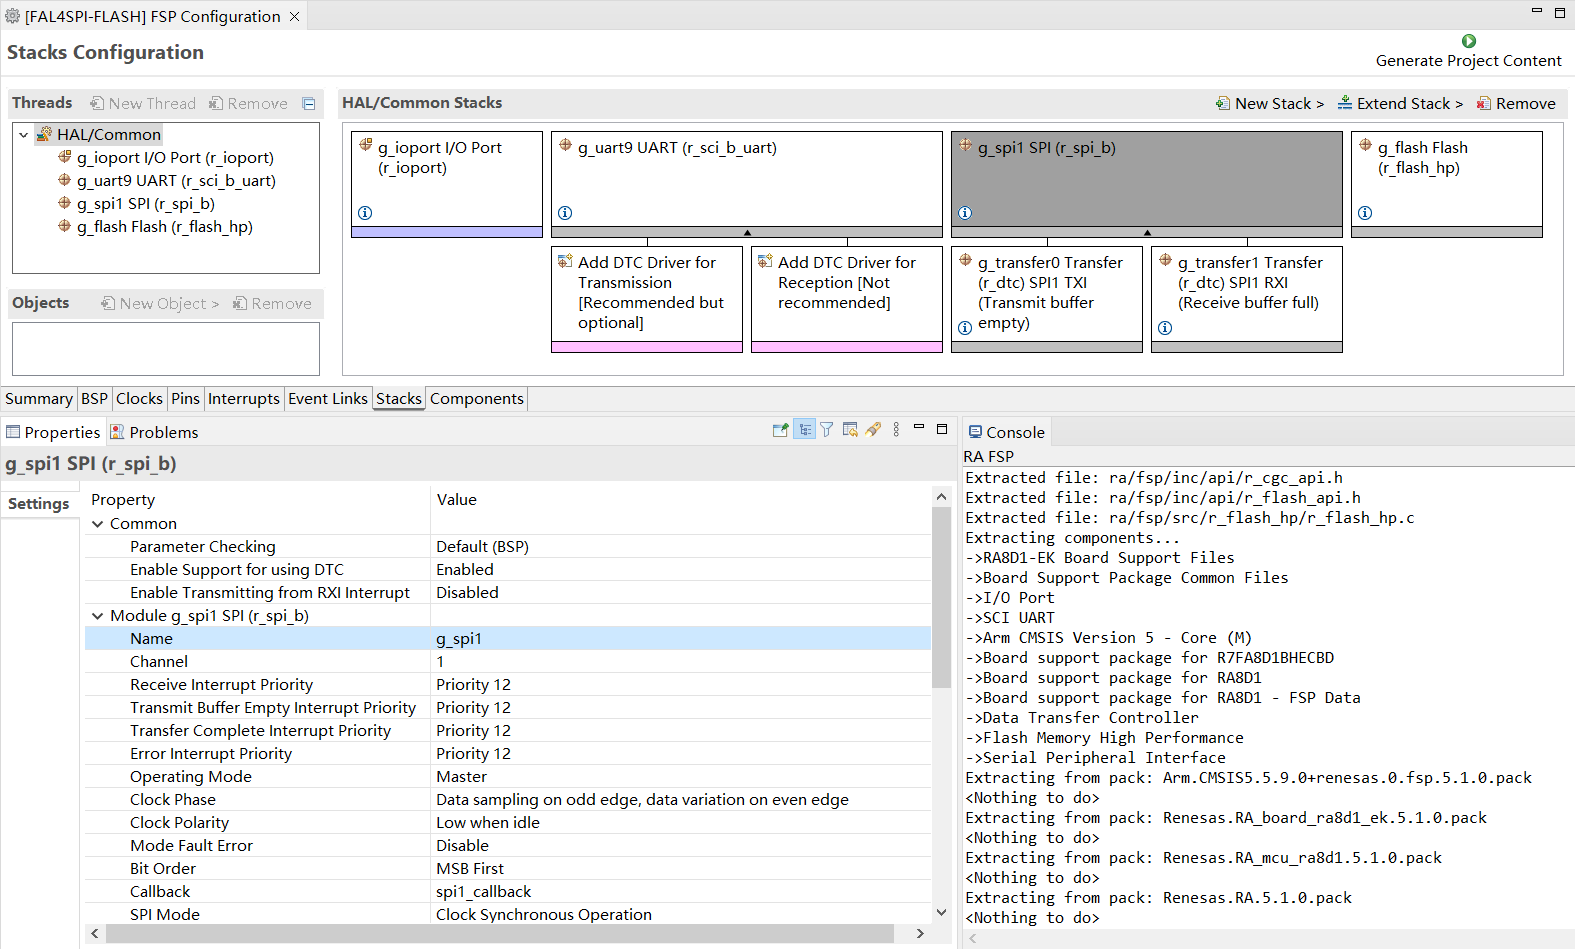
Pins:配置 SPI1 相关引脚
(注:也是因为这里 SPI0 的引脚设置不好,前面才选择启用 SPI1 BUS,原因不详,若有了解、请指教!)
- 最后创建相关文件即可!RASC 光荣退休!(不是)
2.3 代码编写
我这里将 SPI 初始化行为独立成了一个
spi_init.c文件存放在/src路径:1 2 3 4 5 6 7 8 9 10 11 12 13 14 15 16 17 18 19 20 21 22 23 24 25
#include <rtthread.h> #include <rtdevice.h> #include "hal_data.h" #define SPI_NAME "spi10" #define CS_PIN BSP_IO_PORT_04_PIN_13 static struct rt_spi_device *spi_dev; static int rt_spi_device_init(void){ struct rt_spi_configuration cfg; rt_hw_spi_device_attach("spi1", SPI_NAME, CS_PIN); cfg.data_width = 8; cfg.max_hz = 1 * 1000 * 1000; spi_dev = (struct rt_spi_device *)rt_device_find(SPI_NAME); if (RT_NULL == spi_dev){ rt_kprintf("Can't find spi device named %s", SPI_NAME); return -RT_ERROR; } rt_spi_configure(spi_dev, &cfg); return RT_EOK; } INIT_APP_EXPORT(rt_spi_device_init);
然后在
/board/ports/fal_cfg.h文件中定义设备表与分区表,我这里将 BootLoader 和 APP 放在片上 Flash,外挂 Flash 单独分区:1 2 3 4 5 6 7 8 9 10 11 12 13 14 15 16 17 18 19 20 21 22 23 24 25 26 27 28
#ifndef _FAL_CFG_H_ #define _FAL_CFG_H_ #include "hal_data.h" extern const struct fal_flash_dev _onchip_flash_hp0; extern const struct fal_flash_dev _onchip_flash_hp1; extern struct fal_flash_dev nor_flash0; /* flash device table */ #define FAL_FLASH_DEV_TABLE \ { \ &_onchip_flash_hp0, \ &_onchip_flash_hp1, \ &nor_flash0, \ } /* ====================== Partition Configuration ========================== */ #ifdef FAL_PART_HAS_TABLE_CFG /** partition table, The chip flash partition is defined in "\ra\fsp\src\bsp\mcu\ra6m4\bsp_feature.h". * More details can be found in the RA6M4 Group User Manual: Hardware section 47 Flash memory.*/ #define FAL_PART_TABLE \ { \ {FAL_PART_MAGIC_WROD, "boot", "onchip_flash_hp0", 0, BSP_FEATURE_FLASH_HP_CF_REGION0_SIZE, 0}, \ {FAL_PART_MAGIC_WROD, "app", "onchip_flash_hp1", 0, (BSP_ROM_SIZE_BYTES - BSP_FEATURE_FLASH_HP_CF_REGION0_SIZE), 0}, \ {FAL_PART_MAGIC_WROD, "disk", "W25Q64", 0, (BSP_DATA_FLASH_SIZE_BYTES), 0}, \ } #endif /* FAL_PART_HAS_TABLE_CFG */ #endif /* _FAL_CFG_H_ */
最后在
/src/hal_entry.c内进行 fal 的初始化即可:1 2 3 4 5 6 7 8 9
#include <rtthread.h> #include <rtdevice.h> #include "hal_data.h" void hal_entry(void) { rt_kprintf("\nHello RT-Thread!\n"); fal_init(); }
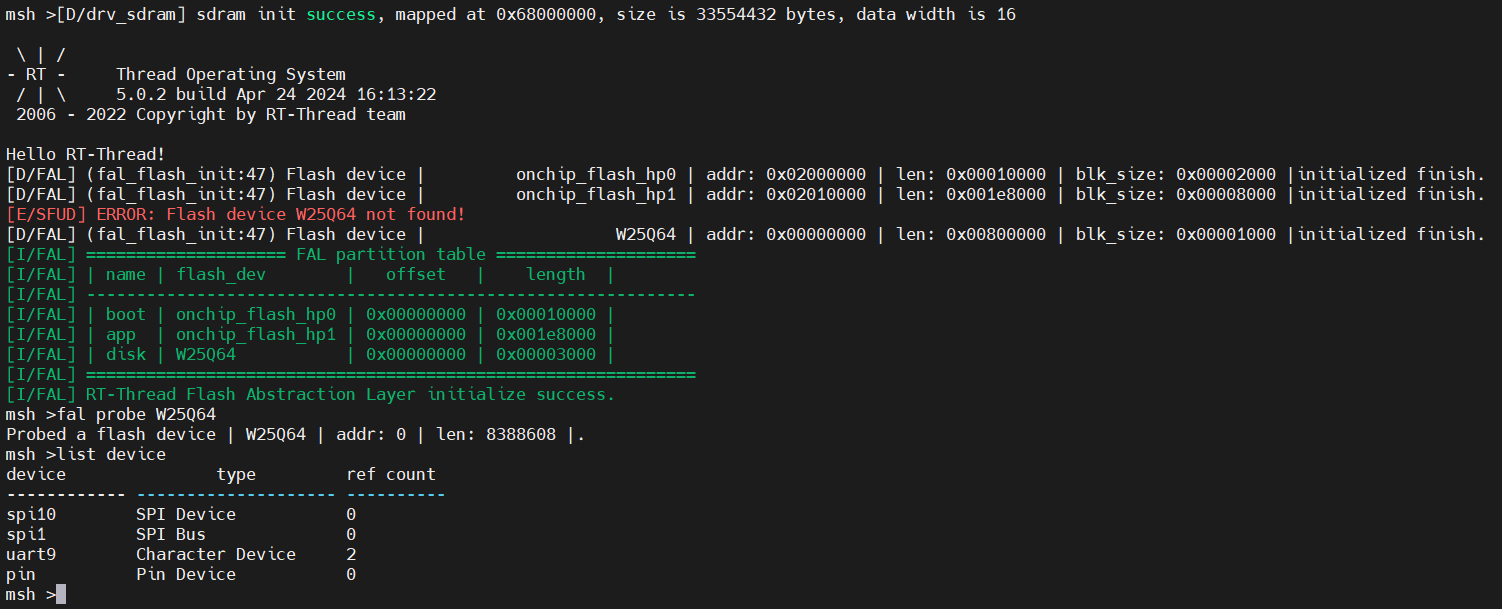
2.4 效果展示
这里不理解为何会有一个报错,明明
fal probe能探到,且list device也有W25Q64…如果搞懂了我会实时更新文章!
我也将最后的工程文件开源在 个人 GitHub 仓库 上,欢迎各位来抓虫~
3 文件系统的搭建
未完待续,敬请期待!
本文由作者按照 CC BY 4.0 进行授权